For the longest time I have been using the Simultaneous Ringing (Sim Ring) feature of Lync Server 2010, previously Office Communications Server 2007 R2. This feature ensured that all my Unified Communications (UC) endpoints and my mobile phone would ring for all inbound calls, allowing me to take the call wherever it was most convenient. It also ensured I did not have to publish my cell number which is a huge benefit – people only needed to call one number to reach me.
Well, I no longer use Sim Ring, and instead am enjoying life with Exchange Server 2010 Unified Messaging’s (UM) Call Answering Rules. Why, you ask? Read on!
One Voicemail
First of all, my cell phone does not have voicemail associated with it. This saves my company $5 per month, but more importantly, it means I only have one voicemail inbox to manage. Of course, with Exchange UM my voicemails are available to me right in my regular Email Inbox as well. Bliss!
So, I have a Lync DID and a cell number, but only one voicemail (Exchange). What if people call my cell number directly? How can people reach me on my cell, if they don’t know the number? Sim Ring was one way to accomplish this, but I found I always had to manage the timing of the rings, and many times I wouldn’t pick up that inbound call on my cell anyway as I was otherwise occupied. I needed a way to selectively allow people to ring my cell – I found most of the time calls weren’t important enough for me to be interrupted.
Call Answering Rules to the Rescue
Exchange UM Call Answering Rules allow me to configure a personal message and choice of options for callers who reach my voicemail. Instead of just leaving a message, those who call me are provided with an option to try me on my cell phone if the call is important enough. It goes like this…
- Someone calls me at my Lync DID.
- If I don’t pick up, the user is transferred to my voicemail, which is where my Call Answering Rule kicks in.
- The user hears this: “You have reached the voicemail for Mark Hickson. To try me on my cell phone, please press 1. To leave me a voicemail, please press #.”
- If the user chooses 1, one of two things happens:
- If the caller is outside of my organization, the caller is asked to speak their name. Exchange records it as “Name”.
- If the caller is within my organization, their GAL name is used and they just go to the next step directly.
- The caller is asked to hold while I am tried on my cell phone.
- My cell phone rings and I pick it up.
- Exchange tells me that “Name” is trying to reach me. I have the option of accepting the call or rejecting it.
- If I accept the call, I am connected to my caller without them ever having to know my cell number.
- If I reject the call, the user is told that I was not able to be reached (they don’t know if I just didn’t pick up or if I picked up and chose not to connect the call) and the user is given the chance to leave a voicemail.
So far this has accomplished two things: Users are able to reach me on my cell phone without knowing the number, and urgent calls are selectively filtered from regular calls because callers have the option of trying my cell phone or not.
What about direct calls to my cell phone?
If I make an outbound call from my cell phone, the caller ID will show my cell phone number. Only by running a client on my phone, such as Communicator Mobile, and using the Call Via Work feature would I be able to make a call appear to people as coming from my office number. So if someone has my cell number, won’t they just dial that? Maybe, and I can’t stop this.
So what about voicemail? I said earlier that my cell phone does not have voicemail service associated with it. I simply set Call Forwarding on my cell phone to transfer unanswered calls to my Lync DID!
In this way, voicemail for all calls to me, regardless of where they target, will end up in my Exchange Inbox and, of course, on my cell phone as an item in my Inbox! Utopia!
Sounds great! How could it get any better!?
All of the above is accomplished with a single Call Answering Rule, but Exchange UM allows me to create many rules and with many different options! I can have different rules applied based on the calling number, the contact’s name, the time of day, and more.
Creating a Call Answering Rule
To create a Call Answering Rule, go to Outlook Web App (this cannot be done from the Outlook rich client), click on Options, and then Phone, and then Voicemail.
This is what my rule looks like:
As you can see, you have options to set both Conditions for the rule and Actions offered to your callers..
Conditions
- If the caller is…
- If it is during the period…
- It my schedule shows that my status is..
- If automatic replies are turned on… (i.e. Out of Office)
Actions
- Find me at the following numbers…
- Transfer the caller to…
So multiple scenarios can be handled with many different conditions. For example, during business hours callers are provided with options to transfer to my Assistant, the Operator, or my cell. But at all times of day, my wife is given the option to try my cell phone. The possibilities are endless!
So give it a try if you have Exchange Server 2010 Unified Messaging, and if you don’t, go get it! Note that you do not need Lync Server 2010 for this – Lync just happens to be my PBX. Lucky me!
Tip
Be sure to set the Dialing Rule Groups and Dialing Restrictions on your UM Dial Plan and UM Mailbox Policy such that your cell, or other numbers, can be dialed. These are the same rules required to enable the Play on Phone feature for voicemails.
More details on Exchange Server 2010 Unified Messaging Call Answering Rules can be found at http://technet.microsoft.com/en-us/library/dd979788.aspx.


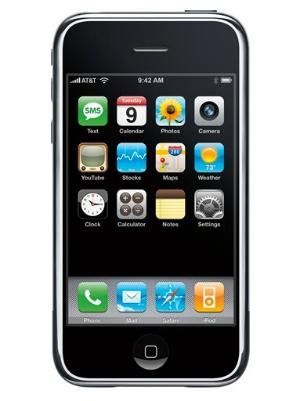
 I recently had the opportunity, and desire, to play a little with the iPhone. I am perhaps the last human in the world who has done so, but I digress.
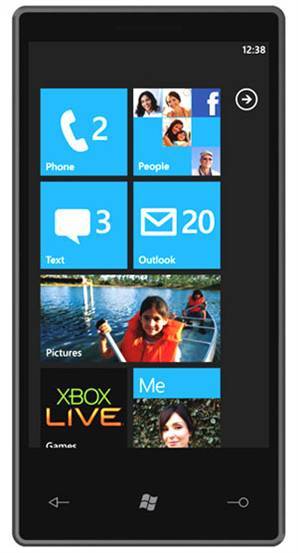
 the Enterprise, does it really matter how good the solution and integration is? In the end it comes down to “Can Microsoft make headway into the Enterprise with Windows Mobile?” Windows Phone 7 is promising, and my plan is to hold on until the end of year, get my hands on a nifty Windows Phone 7 device and all will be well with the world.